
The app, screen by screen
33 screens in the order you meet them. Every one is annotated, so this is as close as you can get to using it without installing it.
This is the app itself, not a mockup. It runs on your machine and holds every credential, so the screens below are where you decide what your agent is allowed to do. The WordPress plugin has its own walkthrough — that is the half that lives on each site and enforces those decisions.
If you want the procedure to follow with the app open in front of you, that is the install guide; this page is for deciding whether you want to.
Pick your agent
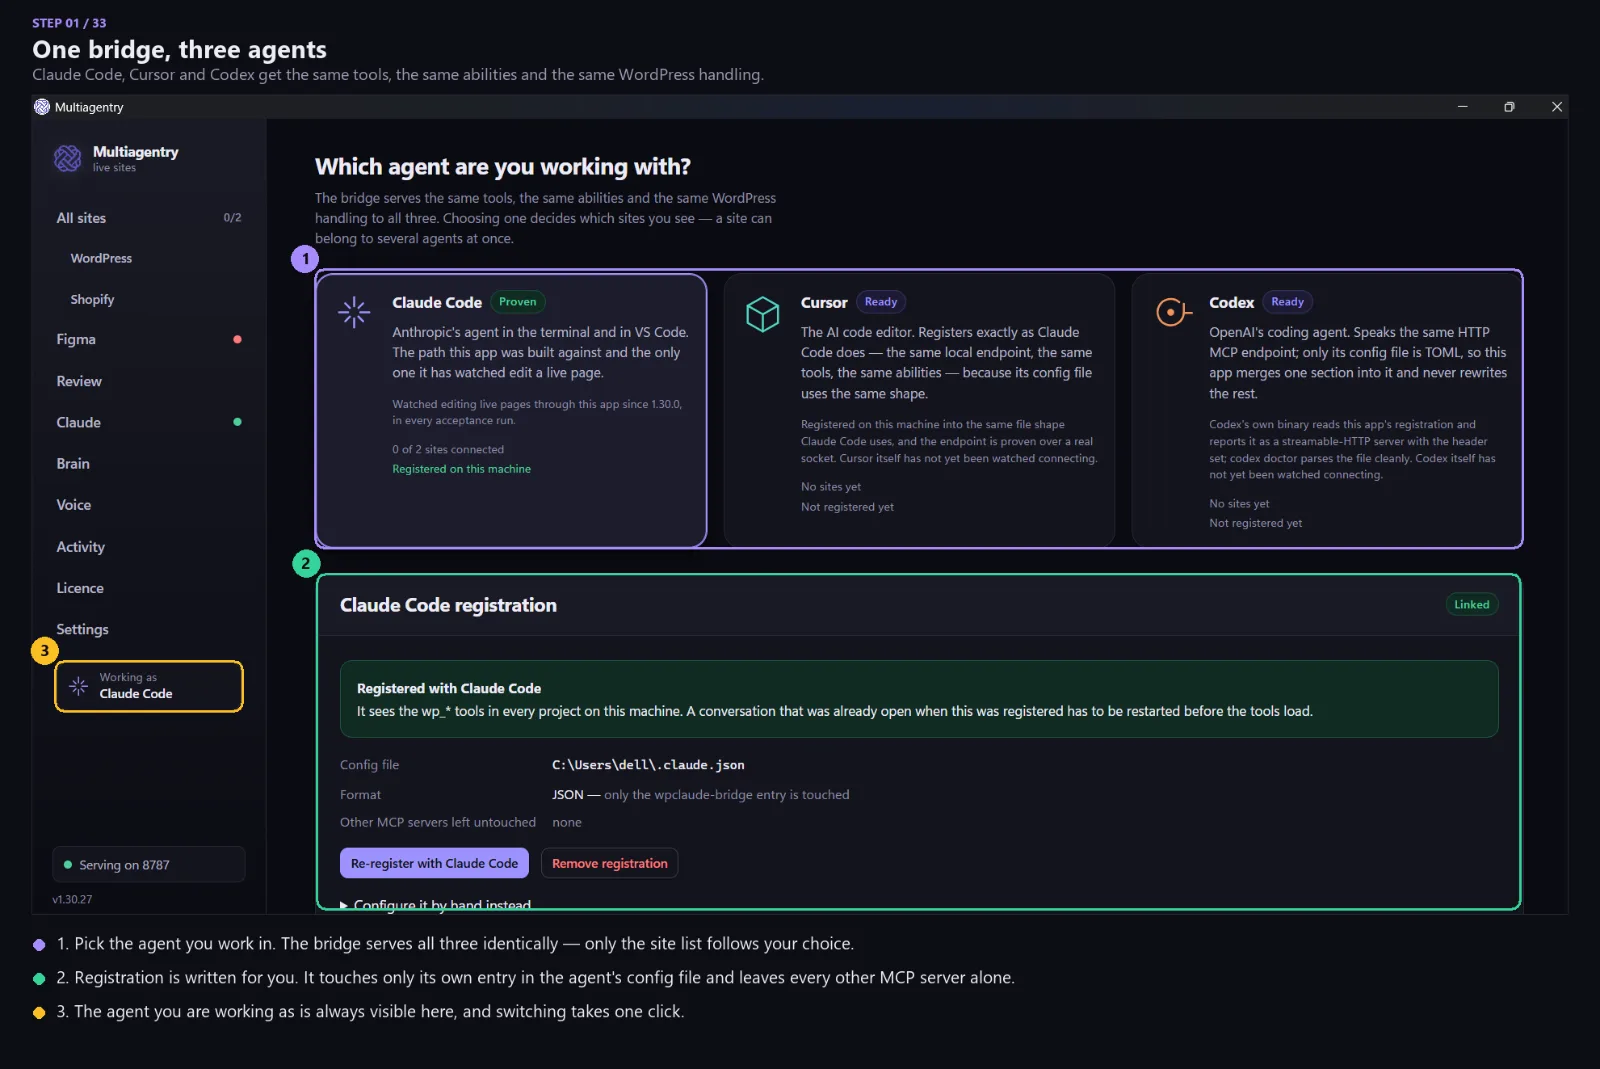
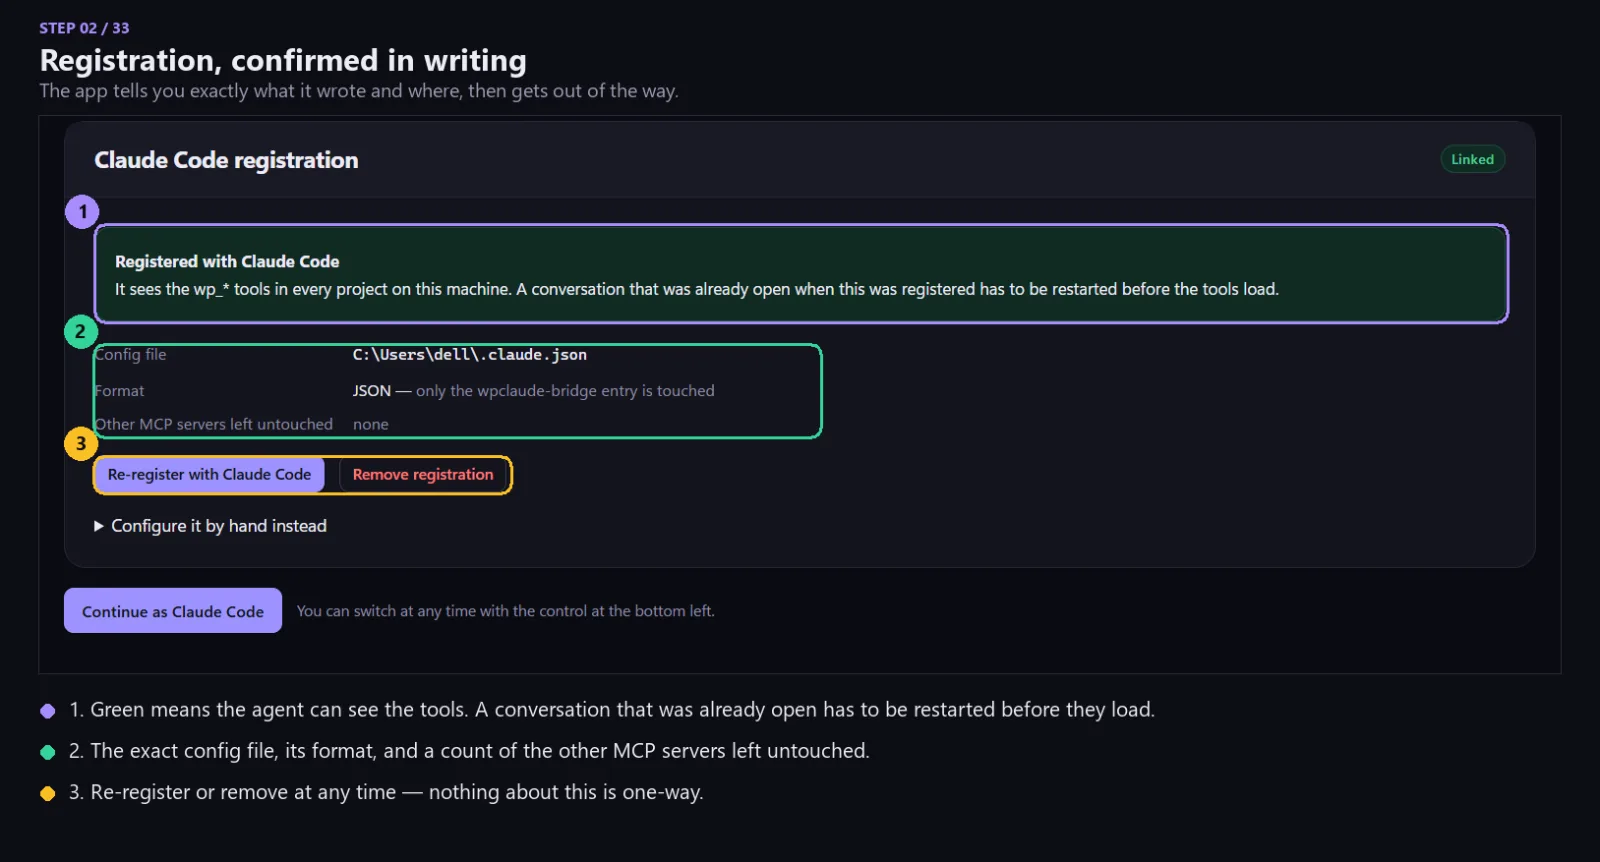
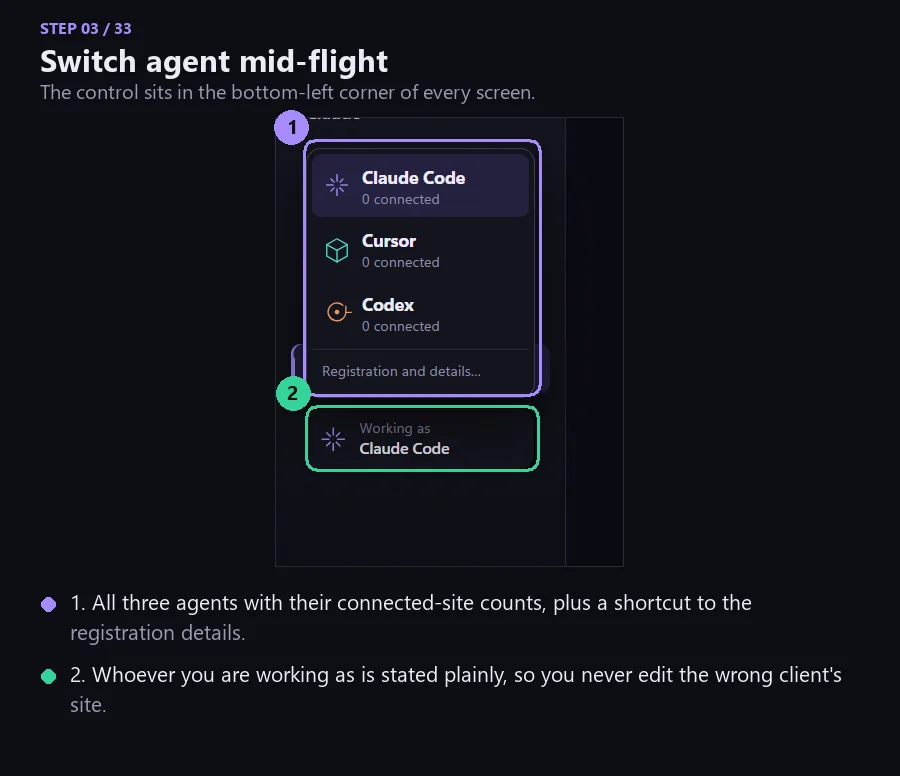
The app does not include an AI. It plugs into the one you already pay for, and writing that connection is the first thing it does.
Activate the licence
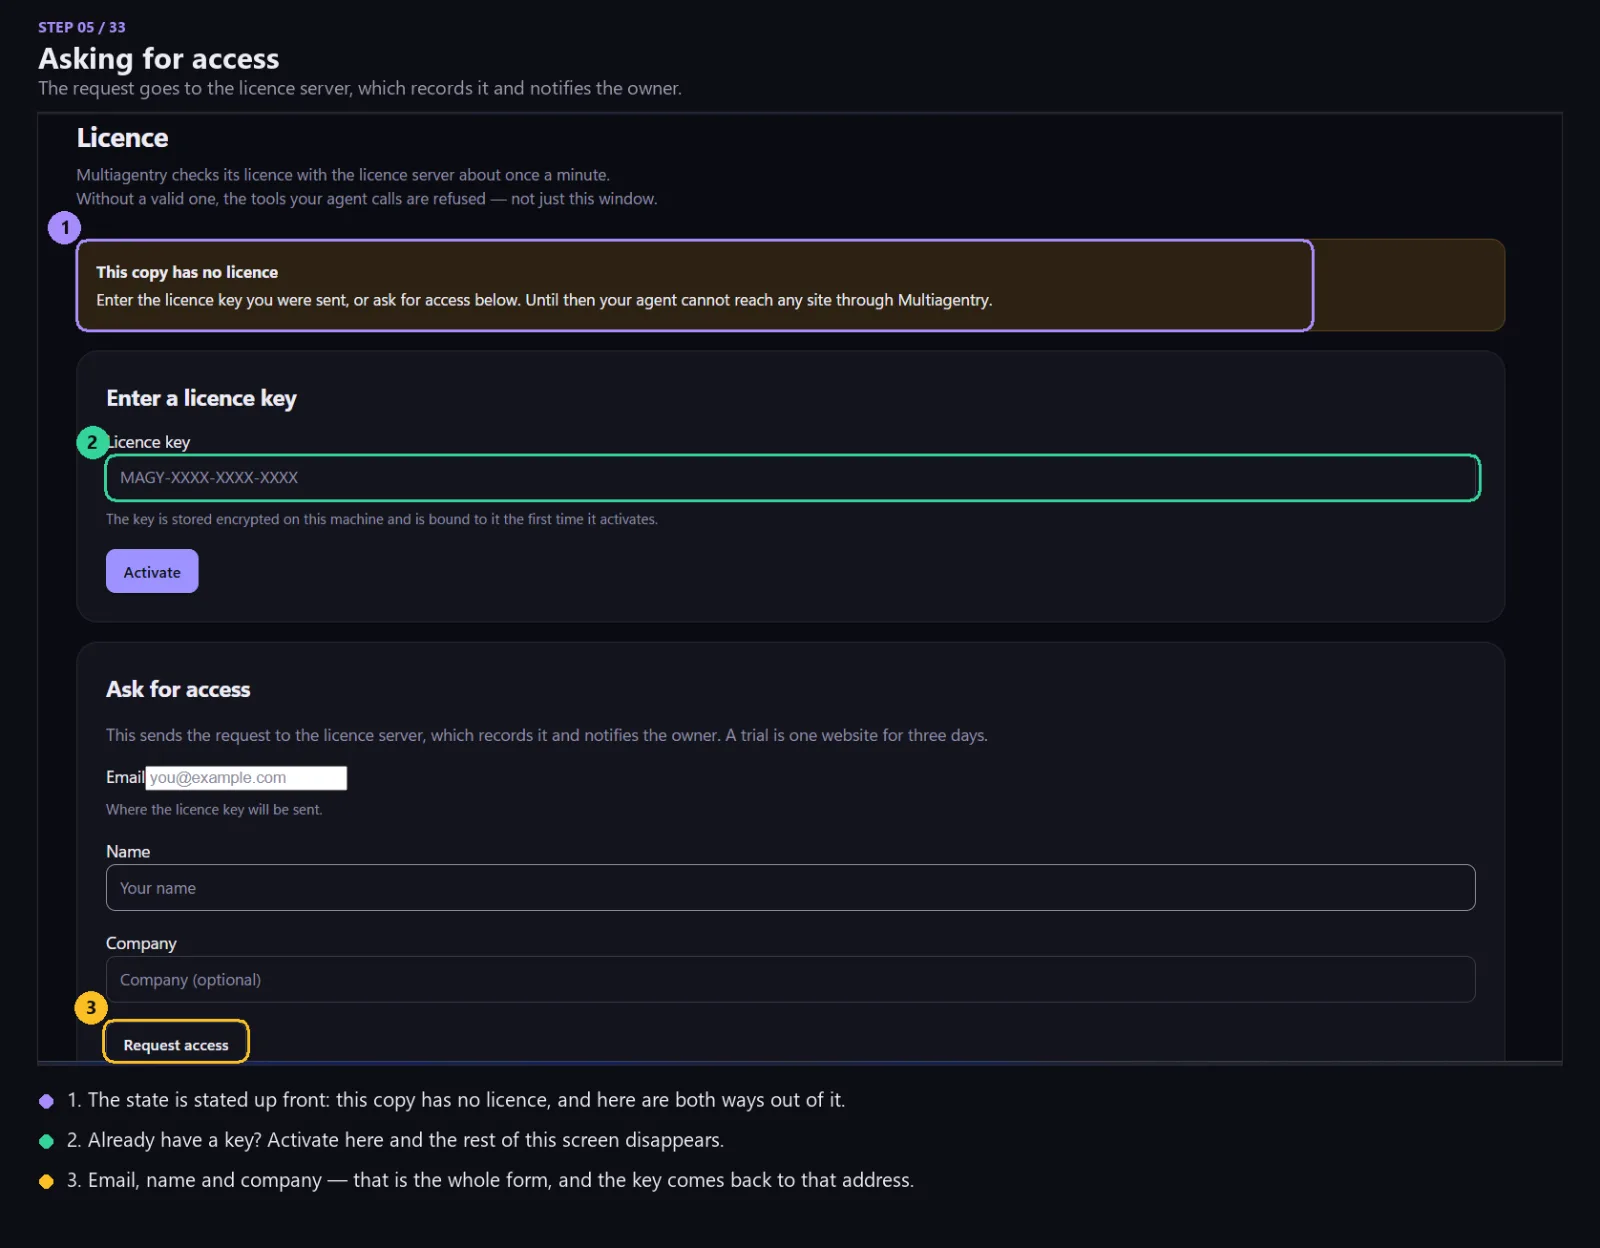
One key, bound to this machine. Nothing below works until this screen is green.

Add your sites
WordPress and Shopify live in one list. A site is invisible to the agent until you link it, and unlinking it is one switch.


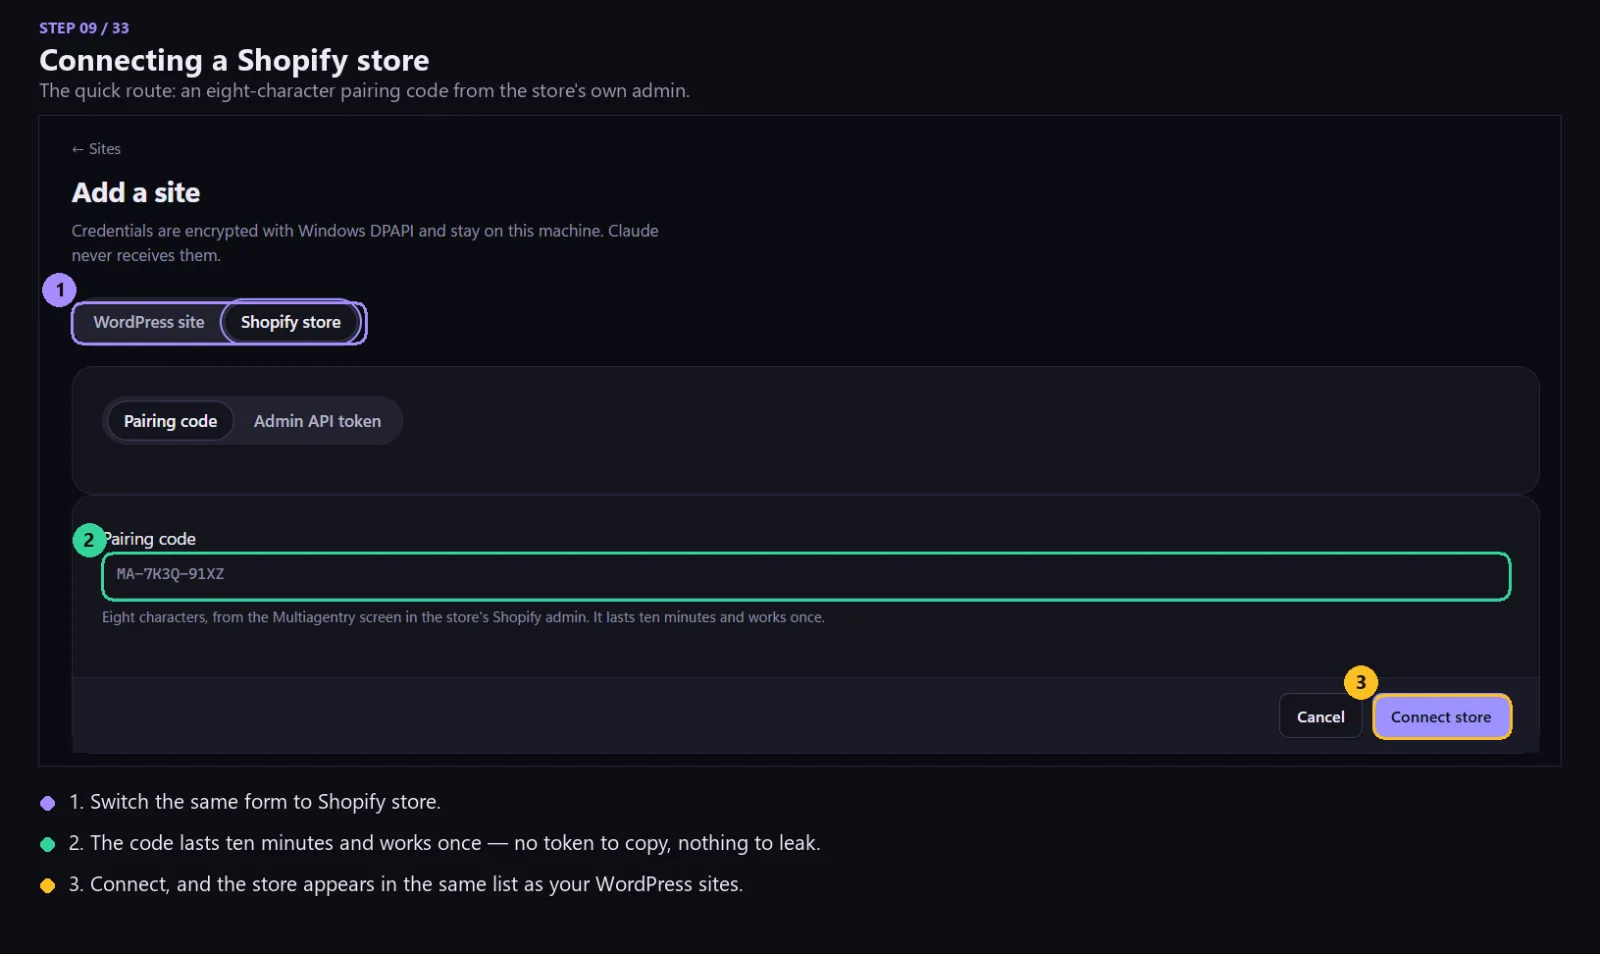
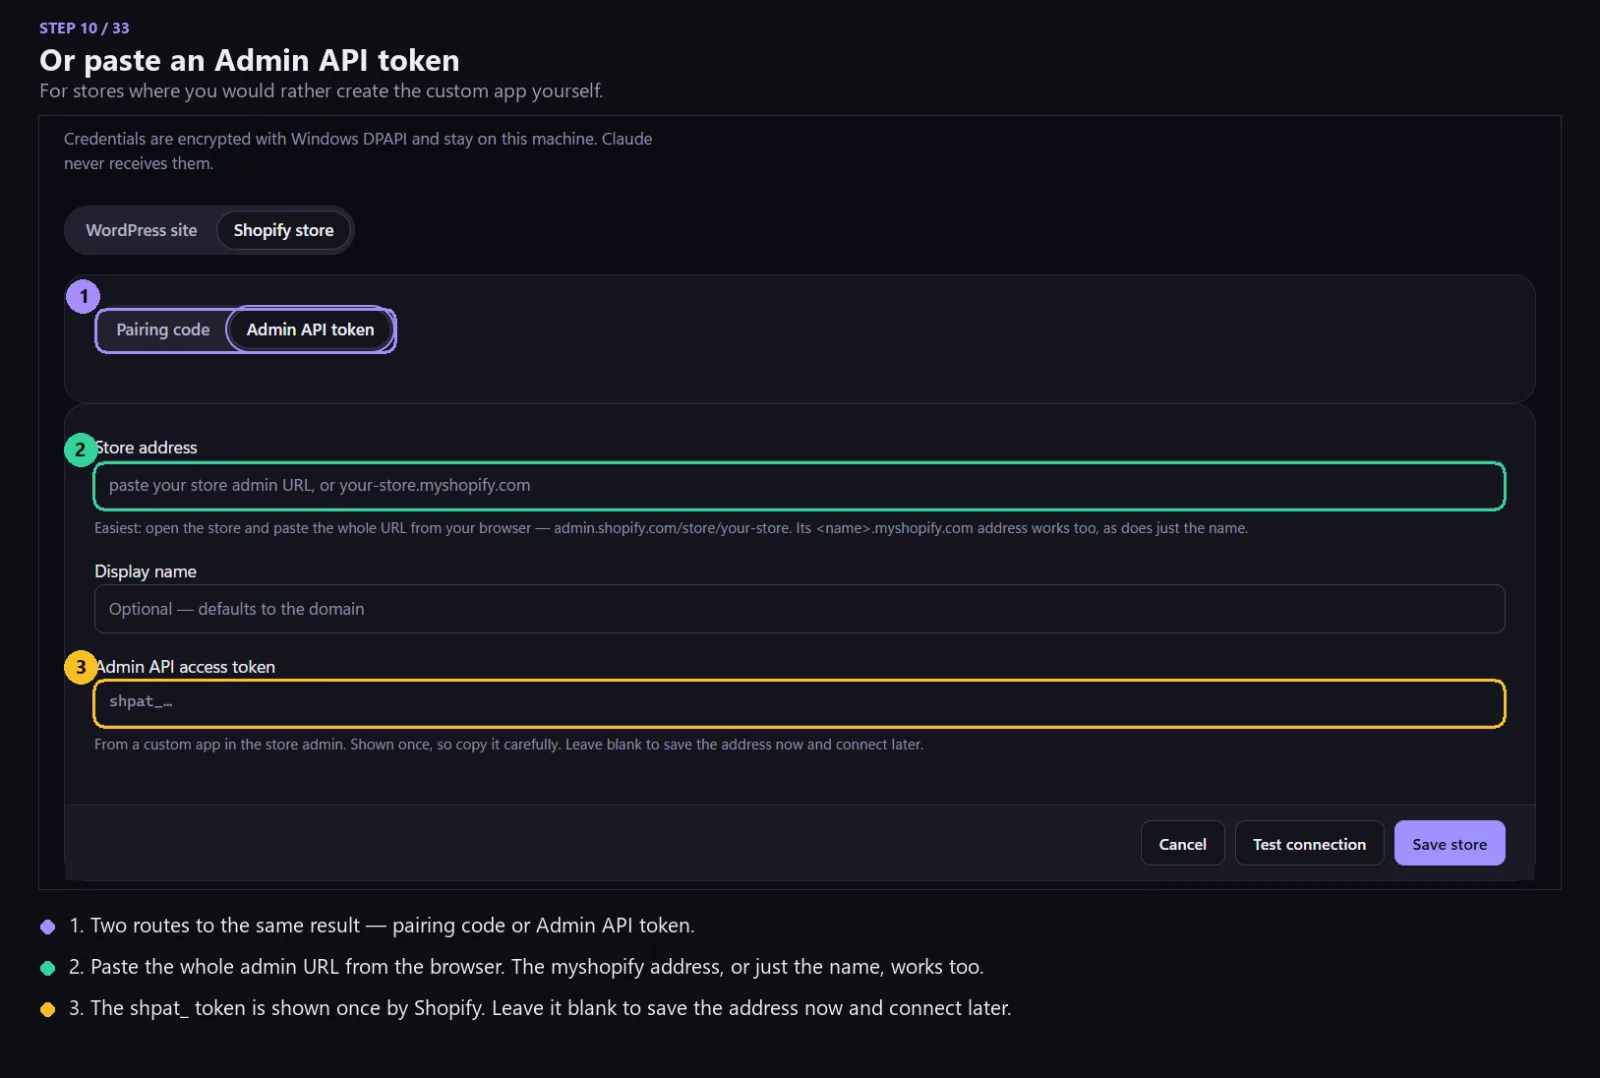


One site, in full
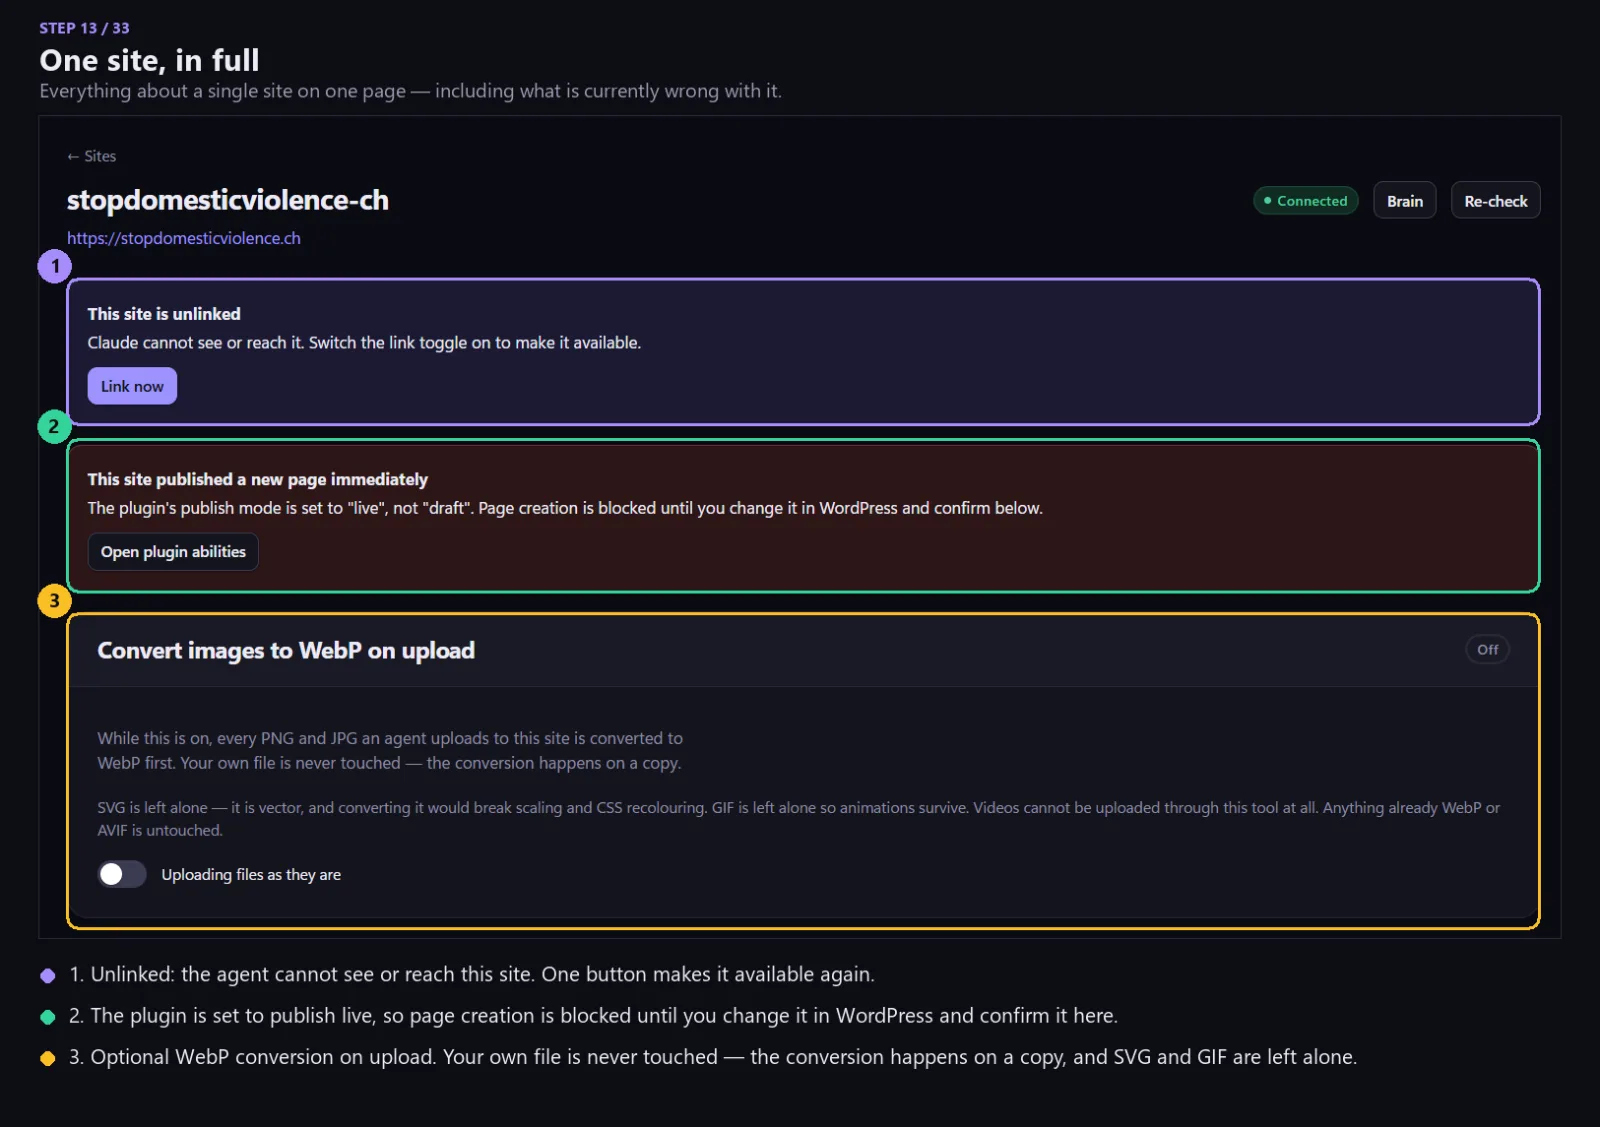
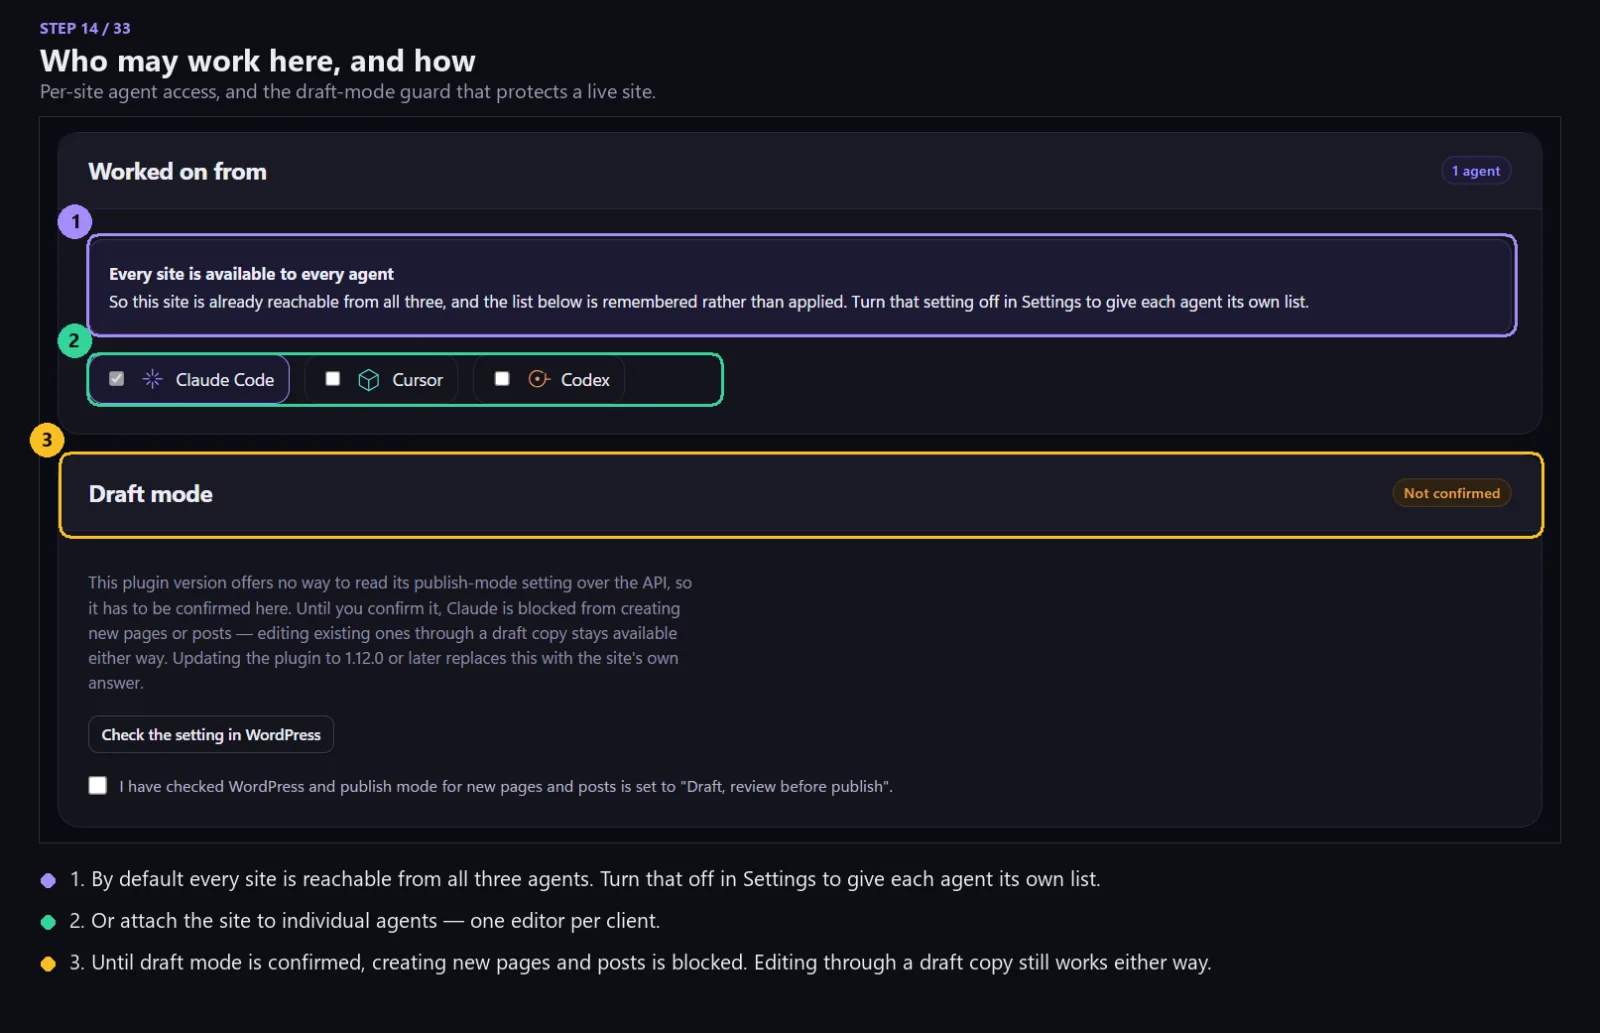
Everything about a single site on one page, including what is currently wrong with it. This is the screen you will spend the most time on.


Figma, if you use it
Optional, and skippable. It is what turns a Figma frame into an Elementor section.


The brain
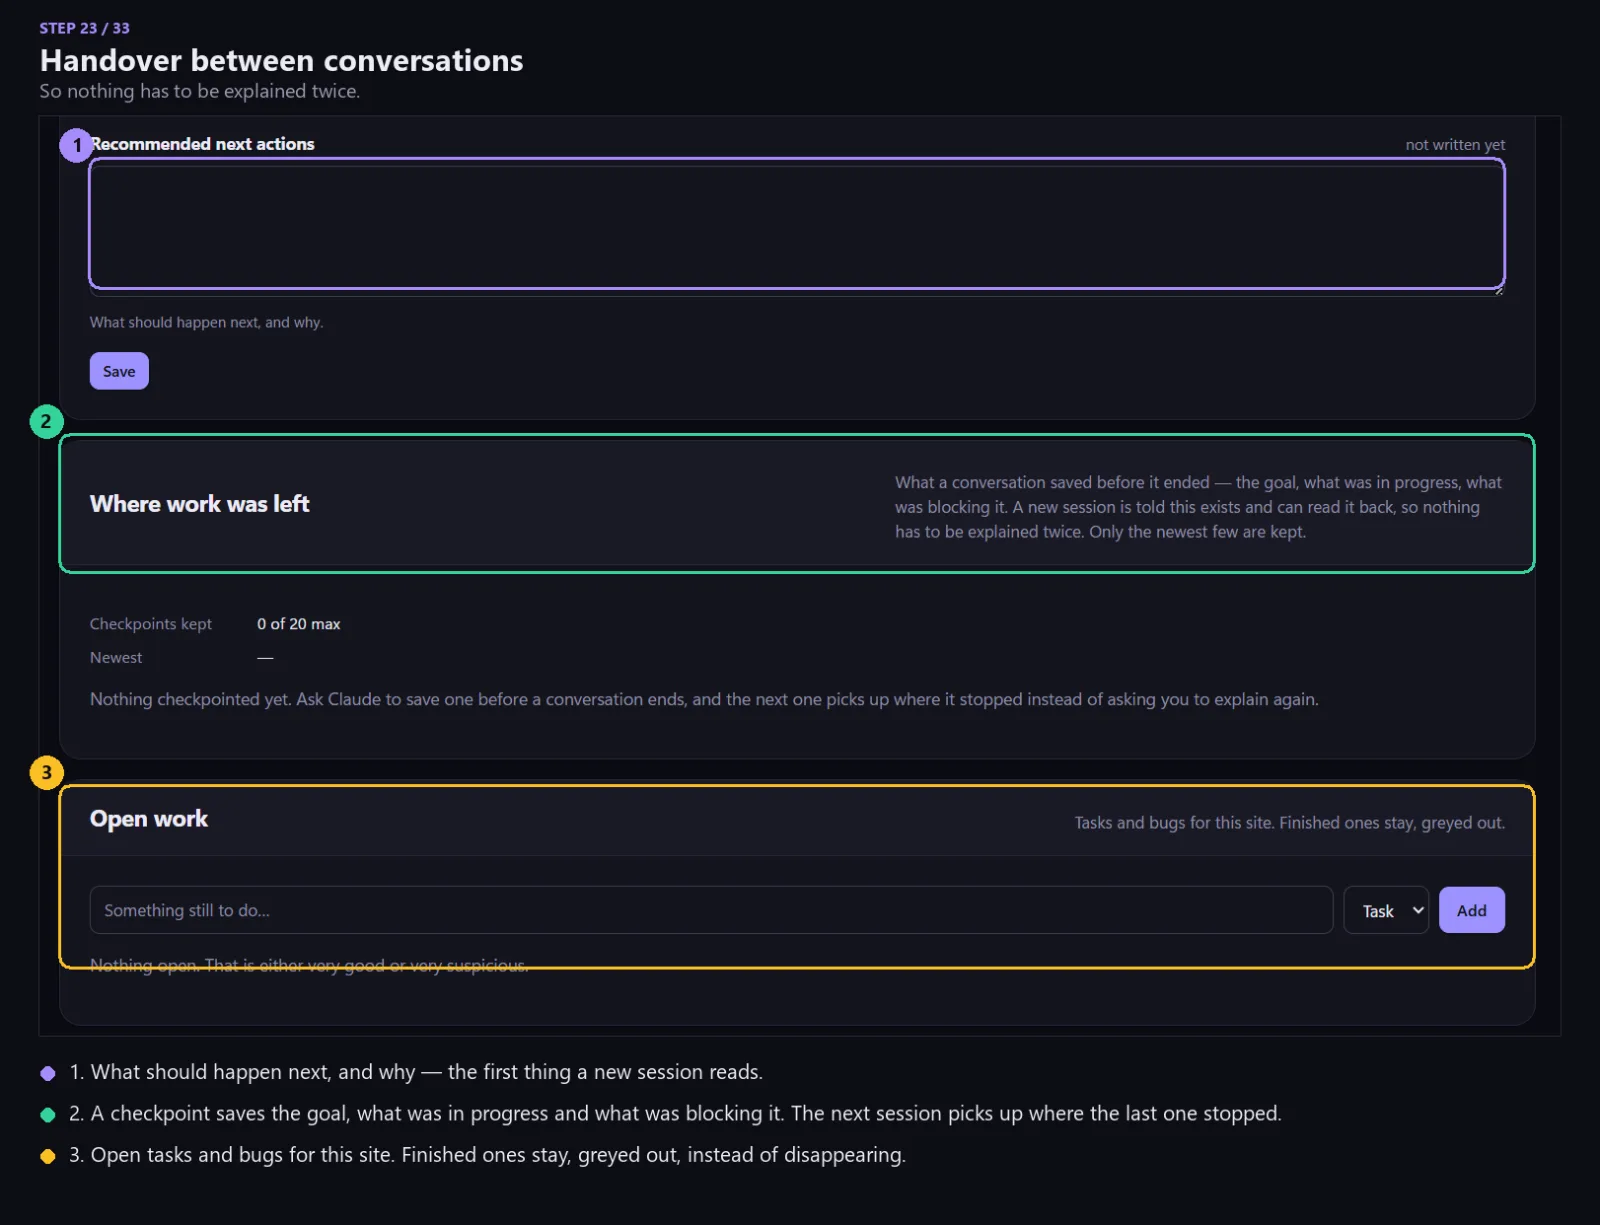
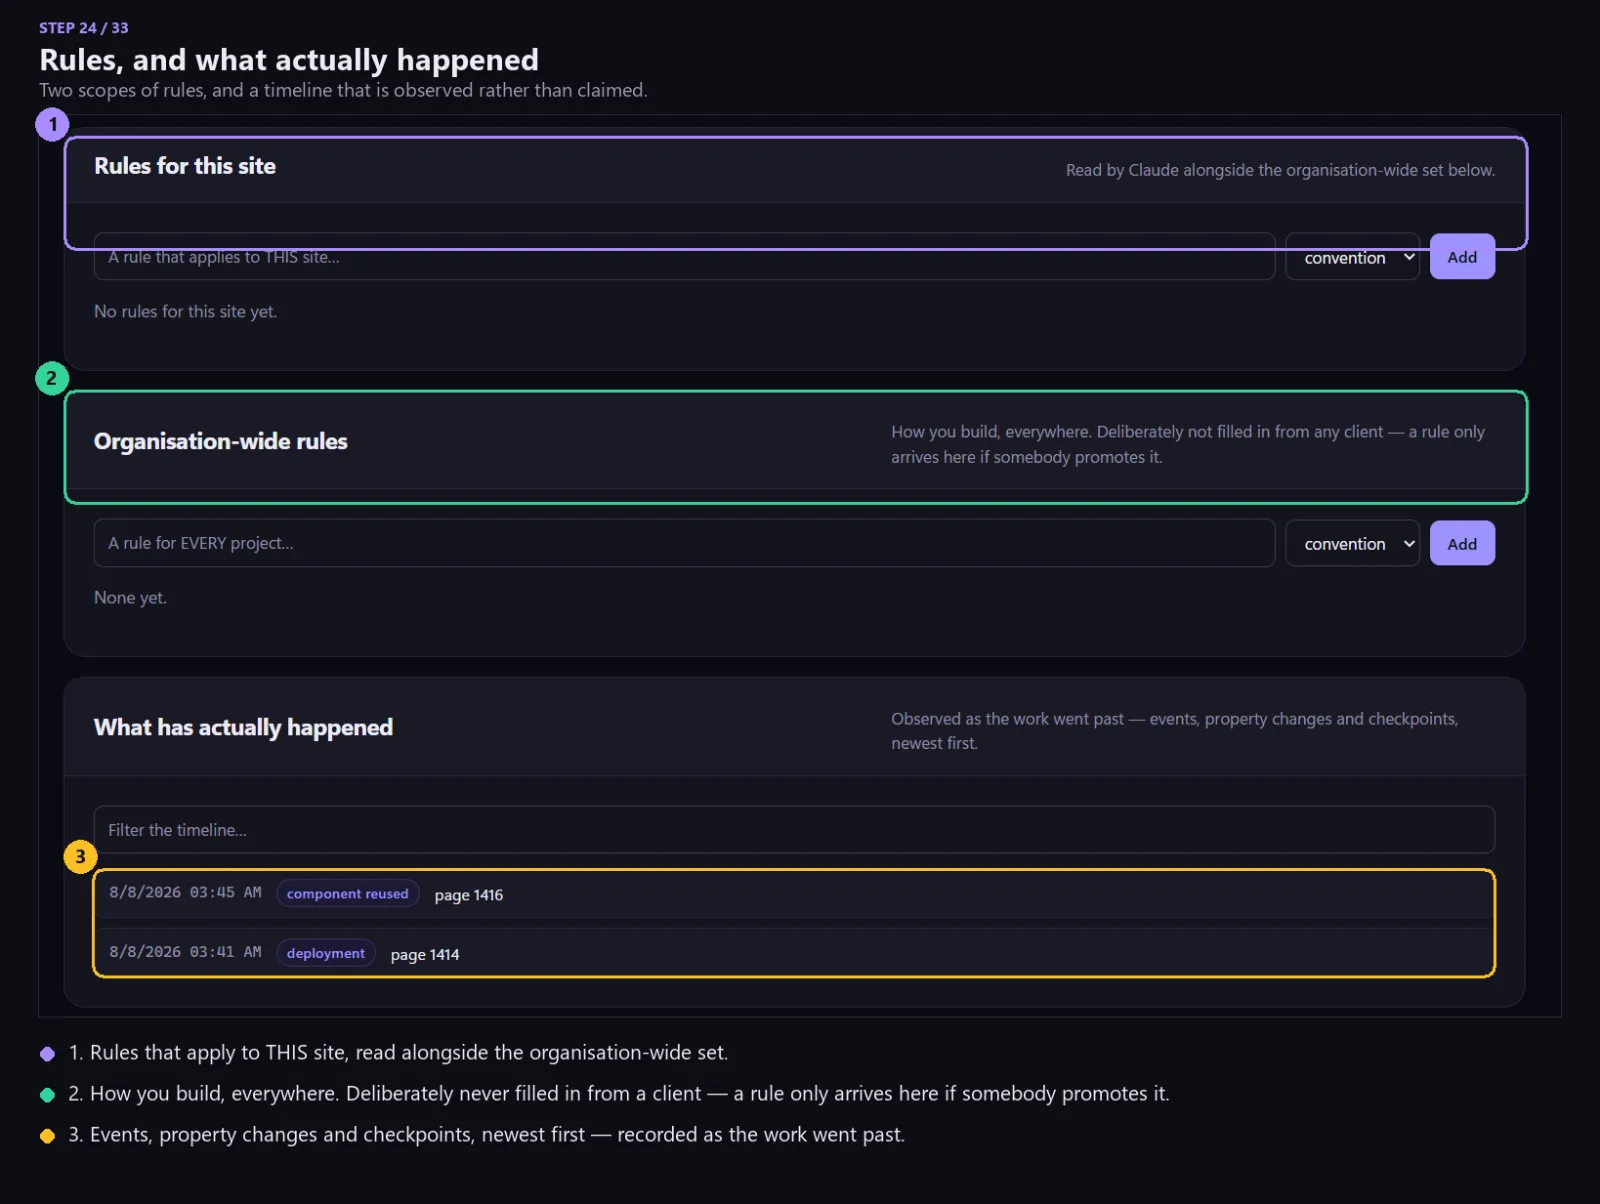
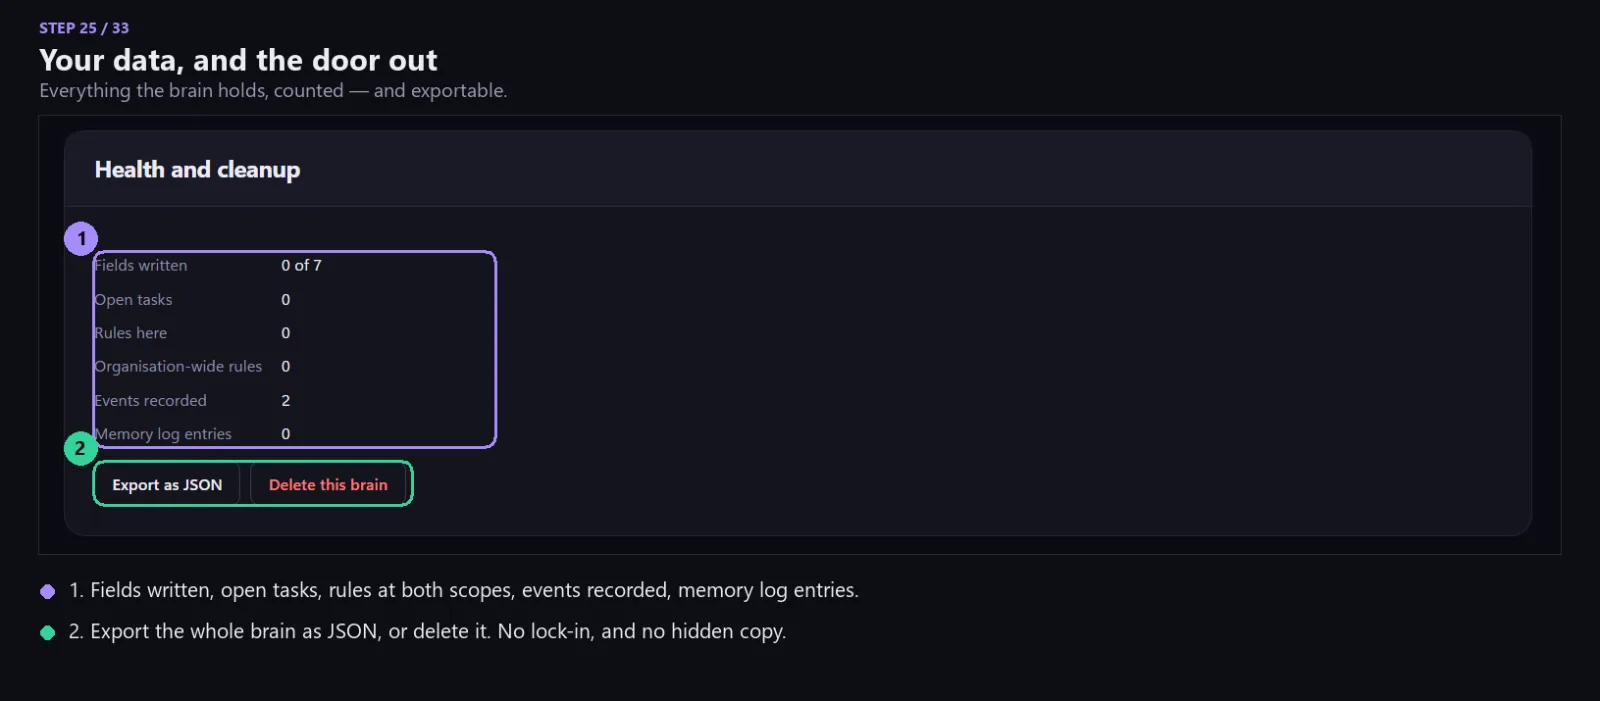
What the app remembers about a project, so you are not re-explaining it every session. This is the part that makes the second month cheaper than the first.


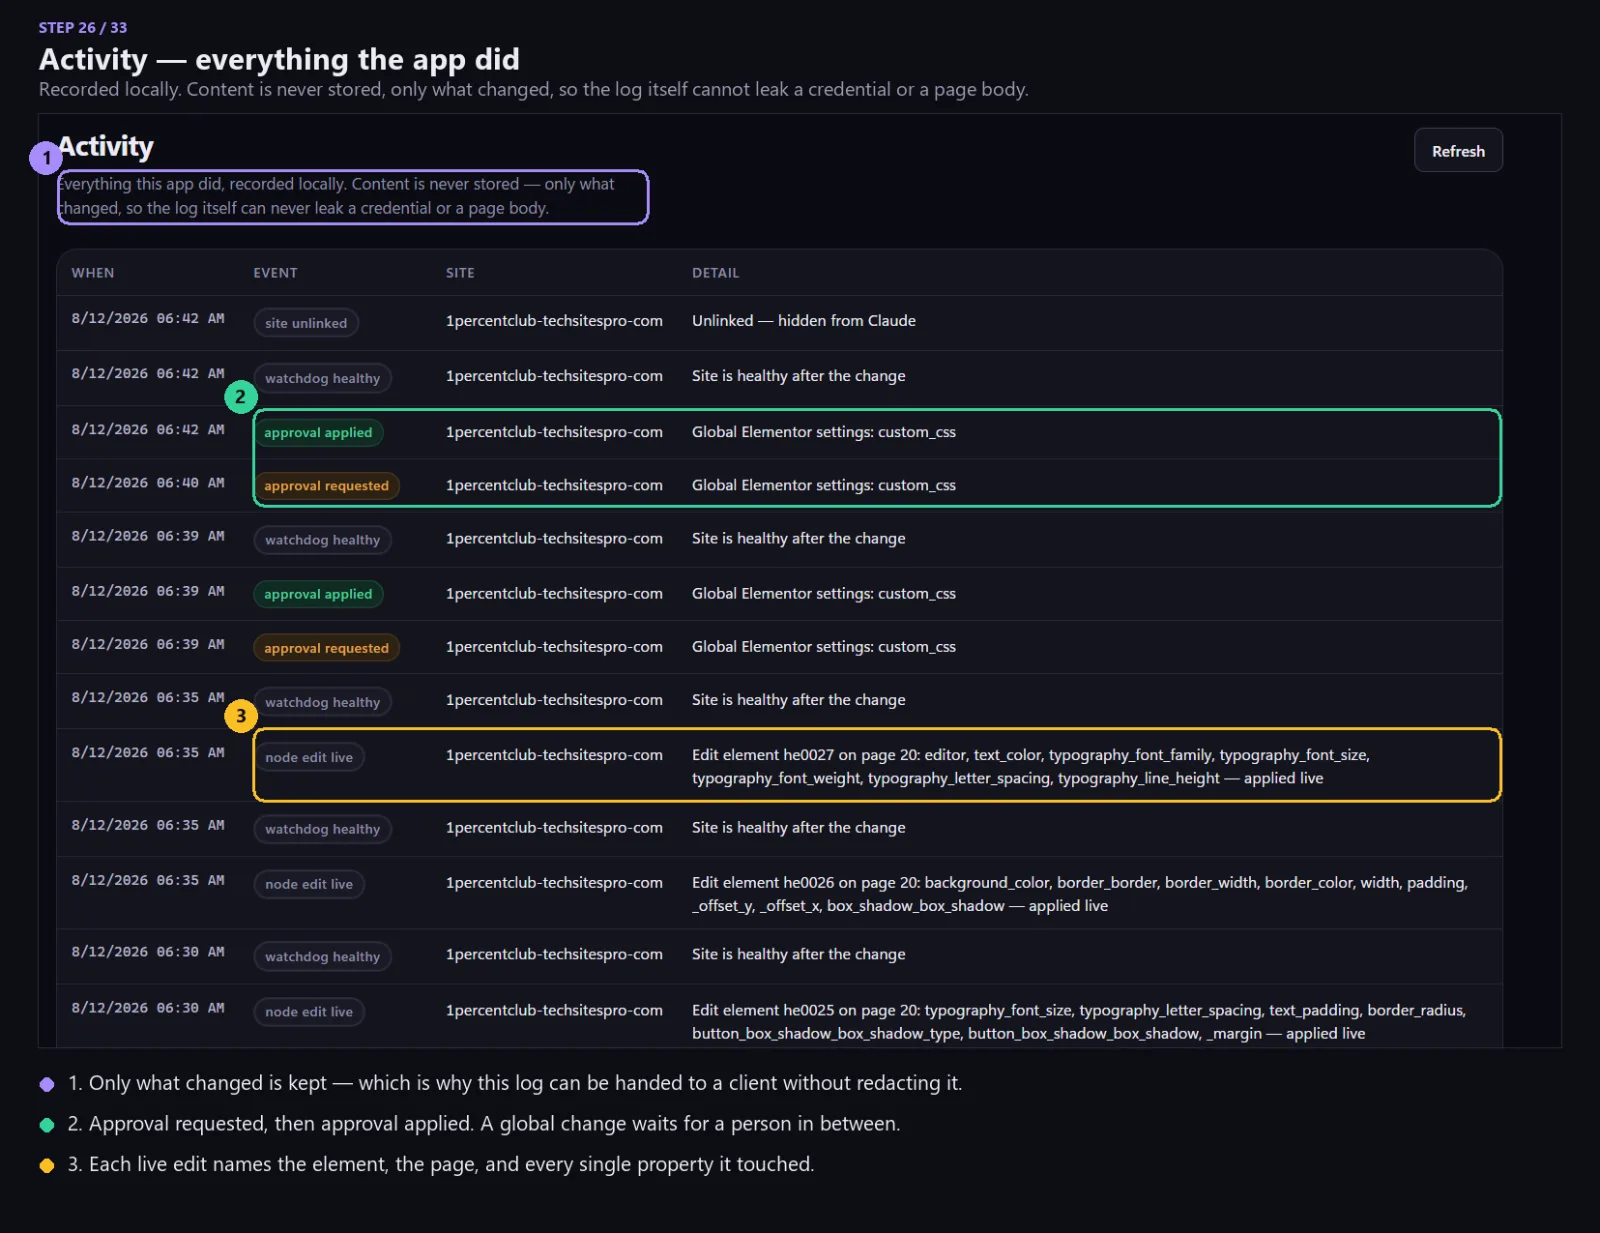
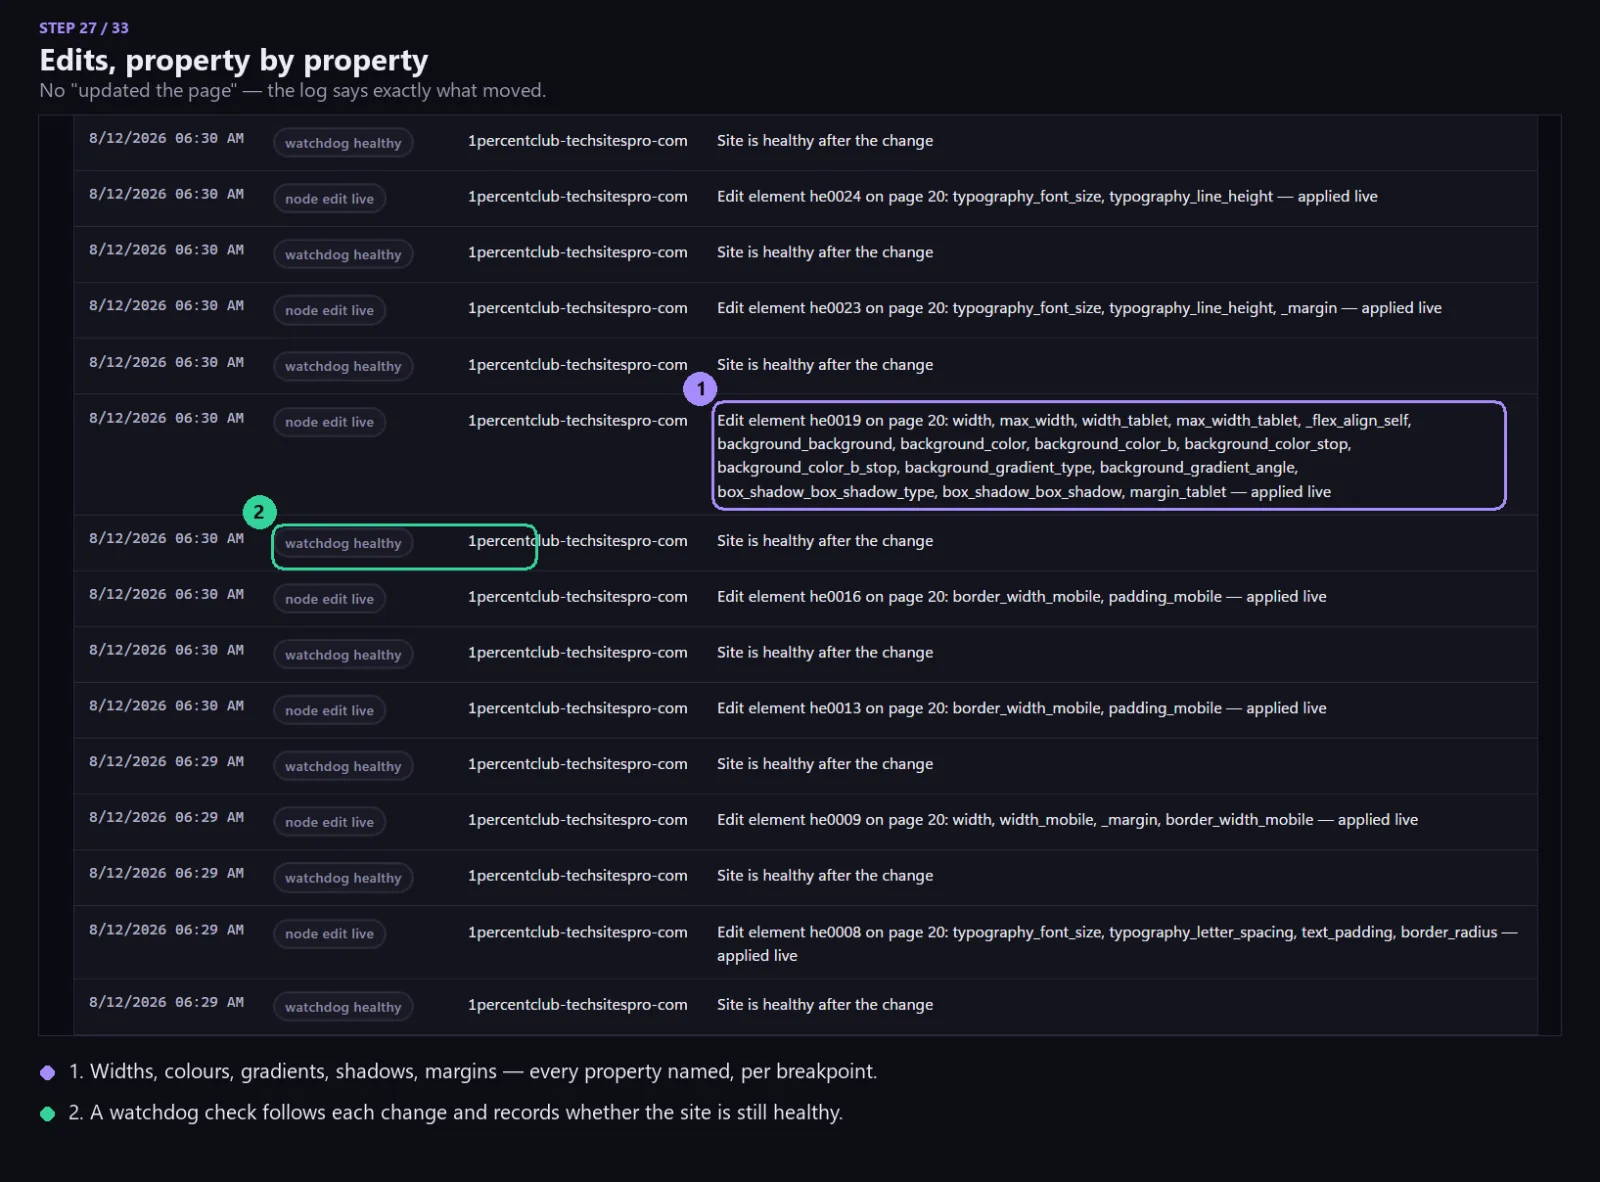
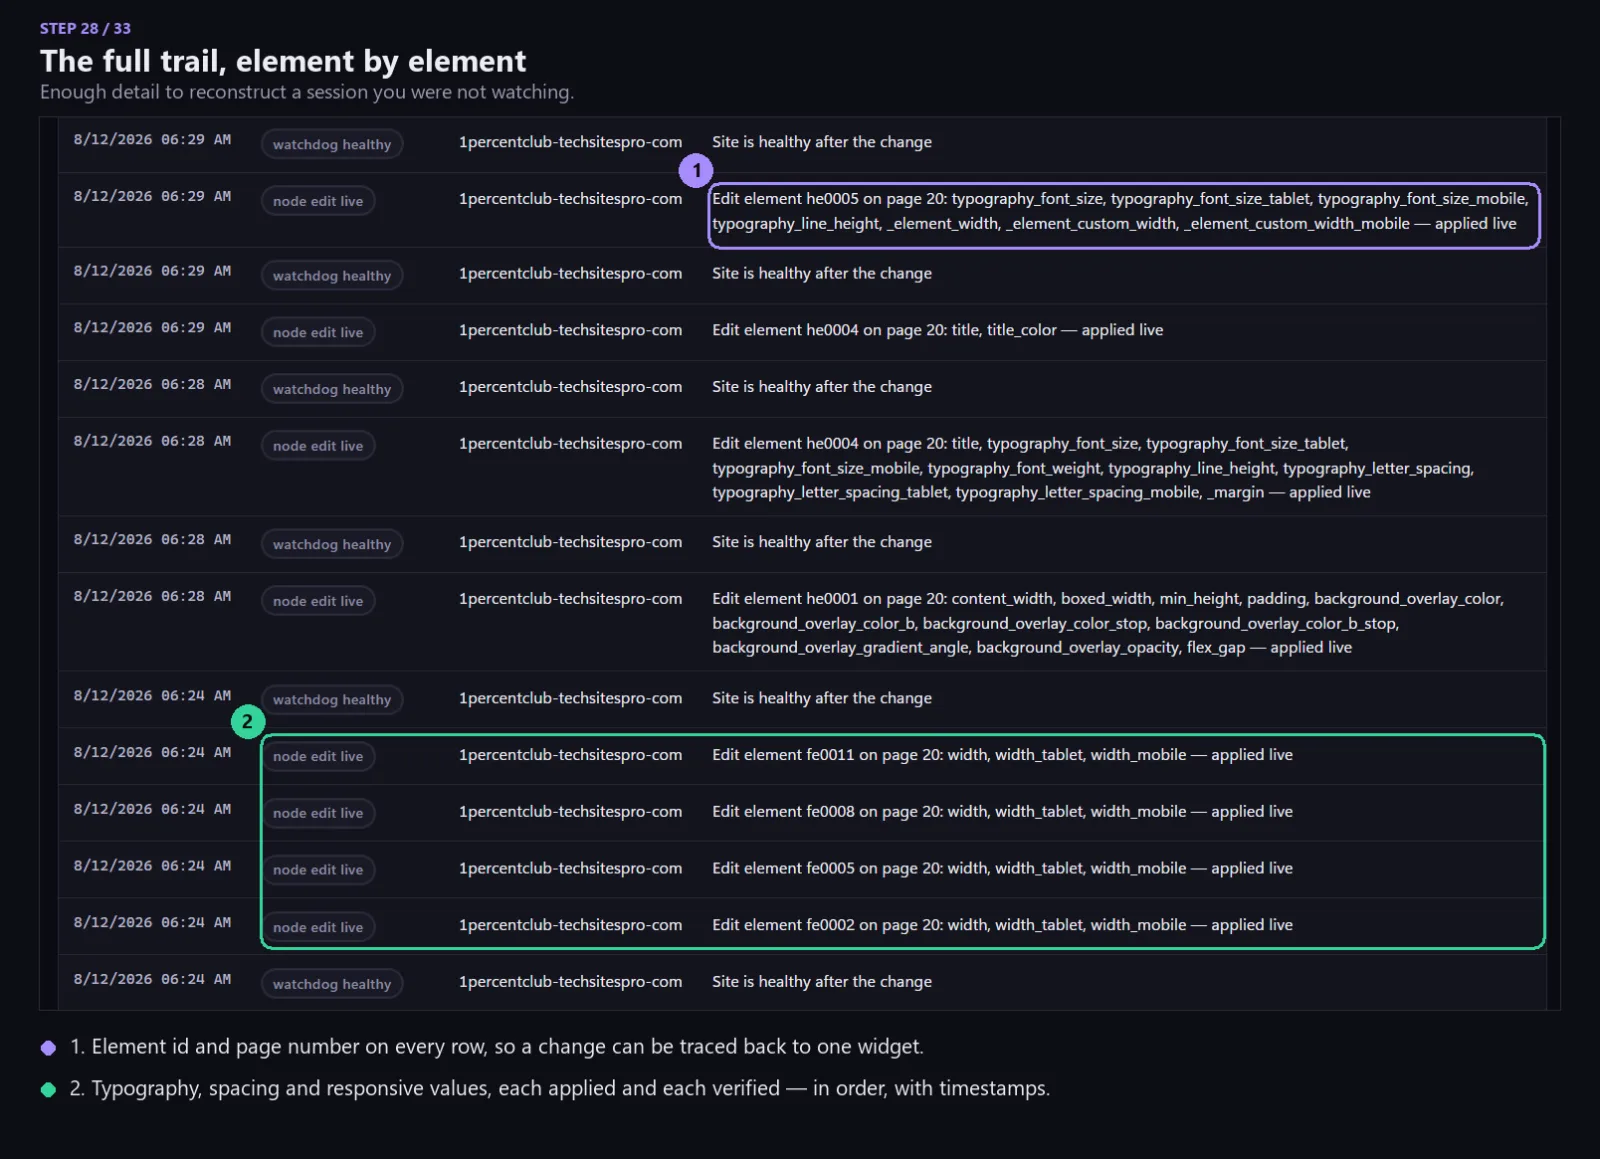
Everything it did
Recorded locally, and content is never stored — only what changed. Which is why this log can be handed to a client without redacting it.
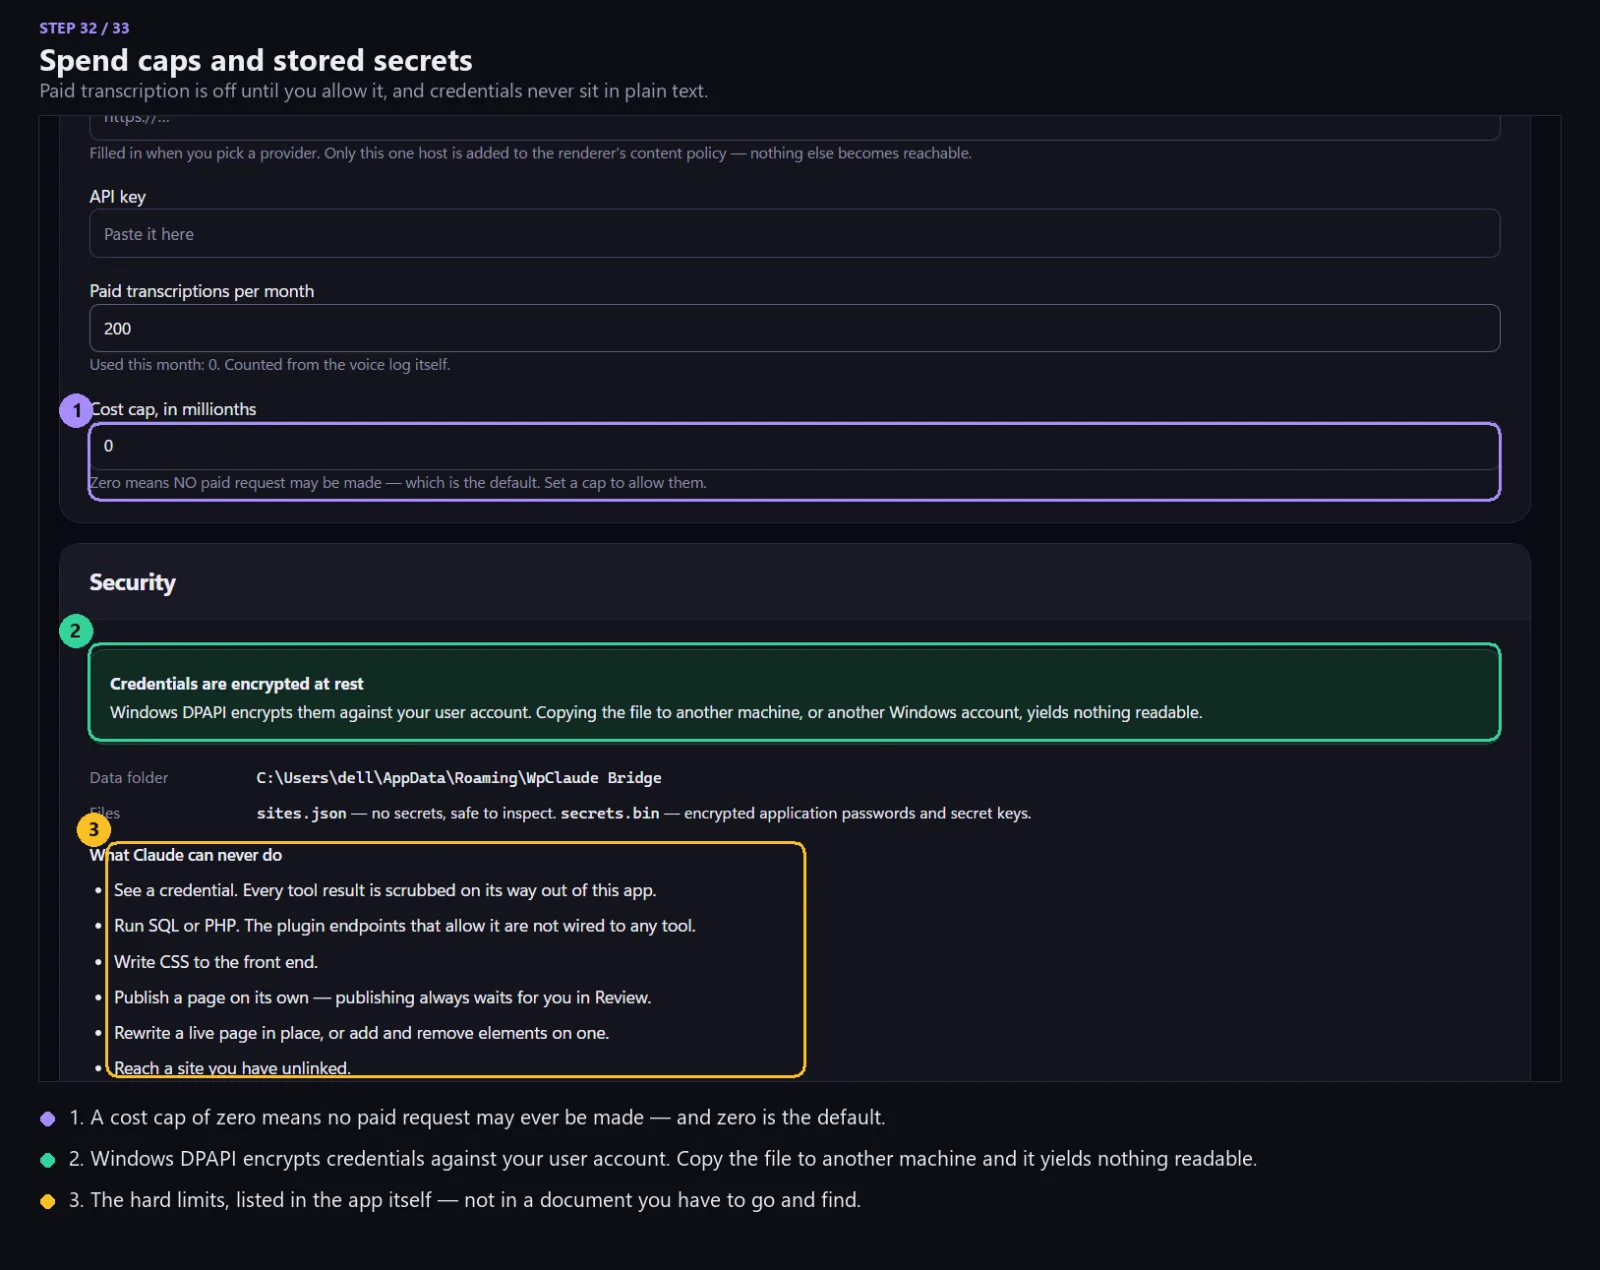
Settings worth knowing about
The defaults are the cautious ones. These are the five screens where you would change that.



What happens after all that
Nothing on these screens is the work. They are the setup, and it is a one-off: once an agent is registered and a site is linked, you stop opening the app and start talking to your agent instead.
The app is where you decide what is allowed. Your agent is where the work is asked for, and the what it does section on the front page is the shorter version of that half.
The parts worth looking at twice
- Step 15, abilities. Sixty-four switches, all off on a fresh install, set per site. It is the screen that decides how much of this you are actually turning on.
- Step 13, the site page. Note the warning that page creation is blocked because the plugin is set to publish live rather than draft. It refuses rather than guessing.
- Steps 26 to 28, the log. Content is never recorded, only what changed — which is why it can be handed to a client without redacting it.
Why each of those is built that way is on the security page.
Getting it
The installer comes by email rather than from a button, and the reason is on the download page. The first setup is done with you on a call — these screens are what we walk through together, so nobody meets them alone the first time.
There is a second walkthrough: the WordPress plugin, screen by screen.